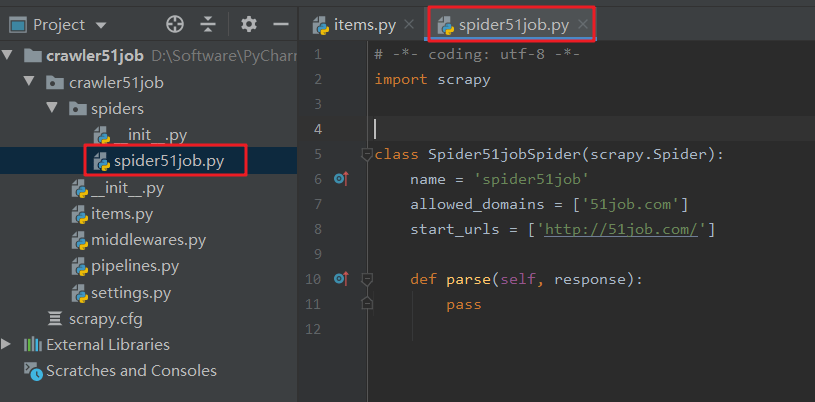
一、创建项目
打开pycharm下面的Terminal窗口
scrapy startproject 项目名
例如:scrapy startproject crawler51job
二、定义要爬取的数据
编写items文件
# -*- coding: utf-8 -*-
# Define here the models for your scraped items # # See documentation in: # https://docs.scrapy.org/en/latest/topics/items.html
import scrapy
class Crawler51JobItem(scrapy.Item): # define the fields for your item here like: # name = scrapy.Field() position = scrapy.Field() # 职位 company = scrapy.Field() # 公司名 place = scrapy.Field() # 工作地点 salary = scrapy.Field() # 薪资
三、创建并编写爬虫文件
1-创建爬虫文件:
在Terminal窗口中
scrapy genspider -t basic 爬虫文件名 域名

2-编写爬虫文件

【注意】allowed_domains是指要爬取的网址的域名。start_urls是指爬取的起始网页
在parse函数中编写代码
要先导入items文件中的Crawler51JobItem
from crawler51job.items import Crawler51JobItem # -*- coding: utf-8 -*- import scrapy from crawler51job.items import Crawler51JobItem from scrapy.http import Request
class Spider51jobSpider(scrapy.Spider): name = 'spider51job' allowed_domains = ['51job.com'] start_urls = [ 'https://search.51job.com/list/010000,000000,0000,32,9,99,Java%25E5%25BC%2580%25E5%258F%2591,2,1.html']
def parse(self, response): item = Crawler51JobItem() # 利用xpath提取网页信息 item['position'] = response.xpath('//div[@class="el"]/p[@class="t1 "]/span/a/@title').extract() item['company'] = response.xpath('//div[@class="el"]/span[@class="t2"]/a/@title').extract() item['place'] = response.xpath('//div[@class="el"]/span[@class="t3"]/text()').extract() item['salary'] = response.xpath('//div[@class="el"]/span[@class="t4"]/text()').extract() yield item
for i in range(2, 4): # 爬取第2,3页的数据 url = "https://search.51job.com/list/010000,000000,0000,32,9,99,Java%25E5%25BC%2580%25E5%258F%2591,2," + str(i) + ".html" yield Request(url, callback=self.parse)
编写pipelines文件(主要用于对这些item进行处理)
# -*- coding: utf-8 -*-
# Define your item pipelines here # # Don't forget to add your pipeline to the ITEM_PIPELINES setting # See: https://docs.scrapy.org/en/latest/topics/item-pipeline.html from pandas import DataFrame import pandas as pd
class Crawler51JobPipeline(object): def __init__(self): self.jobinfoAll = DataFrame()
def process_item(self, item, spider): jobInfo = DataFrame([item['position'], item['company'], item['place'], item['salary']]).T jobInfo.columns = ['职位名', '公司名', '工作地点', '薪资'] self.jobinfoAll = pd.concat([self.jobinfoAll, jobInfo]) self.jobinfoAll.to_csv('jobinfoAll.csv', encoding='utf-8') # 设置编码格式,防止乱码 return item
编写settings文件(settings文件为爬虫项目的设置文件,主要是爬虫项目的一些设置信息。)
例如,启用了pipelines,需要把settings中相关代码的注释取消

四、爬虫运行及调试
在Terminal
scrapy crawl 爬虫文件名
如:scrapy crawl spider51job
如果运行出错:ModuleNotFoundError: No module named 'win32api'
则需要安装pywin32,去官网下载合适的版本
https://sourceforge.net/projects/pywin32/files/pywin32/Build%20221/
神龙|纯净稳定代理IP免费测试>>>>>>>>天启|企业级代理IP免费测试>>>>>>>>IPIPGO|全球住宅代理IP免费测试


