目录
前言
本文提供将图片分辨率调整的python代码,一如既往的实用主义。
环境依赖
ffmpeg环境安装,可以参考我的另一篇文章:windows ffmpeg安装部署_阿良的博客-CSDN博客
ffmpy安装:
pip install ffmpy -i https://pypi.douban.com/simple
代码
不废话,上代码。
#!/usr/bin/env python
# -*- coding: utf-8 -*-
# @Time    : 2021/12/11 21:43
# @Author  : 剑客阿良_ALiang
# @Site    :
# @File    : image_tool.py

import os
import uuid
from ffmpy import FFmpeg


# 调整图片大小
def change_size(image_path: str, output_dir: str, width: int, height: int):
    ext = os.path.basename(image_path).strip().split('.')[-1]
    if ext not in ['png', 'jpg']:
        raise Exception('format error')
    _result_path = os.path.join(
        output_dir, '{}.{}'.format(
            uuid.uuid1().hex, ext))
    ff = FFmpeg(inputs={'{}'.format(image_path): None}, outputs={
        _result_path: '-vf scale={}:{}'.format(width, height)})
    print(ff.cmd)
    ff.run()
    return _result_path
代码说明:
1、change_size方法入参分别为:图片地址、输出目录地址、需要修改的宽、需要修改的高。
2、验证的图片格式只有png、jpg,如需添加自行添加。
3、为了避免输出文件文件名重复,使用uuid作为文件名。
验证一下:
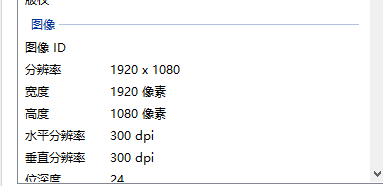
准备的图片如下:


执行代码:
if __name__ == '__main__':
    print(change_size('data/1234.jpg', 'data/', 1280, 720))
执行结果:
E:\ProgramData\Anaconda3\envs\pytorch\python.exe C:/Users/yi/PycharmProjects/test/image_tool.py
ffmpeg -i data/123.jpg -vf scale=1280:720 data/709ad7cc5a8a11ec82c82c4d54eea02b.jpg
ffmpeg version n4.3.1-20-g8a2acdc6da Copyright (c) 2000-2020 the FFmpeg developers
  built with gcc 9.3-win32 (GCC) 20200320
  configuration: --prefix=/ffbuild/prefix --pkg-config-flags=--static --pkg-config=pkg-config --cross-prefix=x86_64-w64-mingw32- --arch=x86_64 --target-os=mingw32 --enable-gpl --enable-version3 --disable-debug --enable-iconv --enable-zlib --enable-libxml2 --enable-libfreetype --enable-libfribidi --enable-gmp --enable-lzma --enable-fontconfig --enable-libvmaf --disable-vulkan --enable-libvorbis --enable-amf --enable-libaom --enable-avisynth --enable-libdav1d --enable-ffnvcodec --enable-cuda-llvm --disable-libglslang --enable-libass --enable-libbluray --enable-libmp3lame --enable-libopus --enable-libtheora --enable-libvpx --enable-libwebp --enable-libmfx --enable-libopencore-amrnb --enable-libopencore-amrwb --enable-libopenjpeg --enable-librav1e --enable-schannel --enable-sdl2 --enable-libsoxr --enable-libsrt --enable-libtwolame --enable-libvidstab --enable-libx264 --enable-libx265 --enable-libxvid --enable-libzimg --extra-cflags=-DLIBTWOLAME_STATIC --extra-cxxflags= --extra-ldflags=-pthread --extra-libs=-lgomp
  libavutil      56. 51.100 / 56. 51.100
  libavcodec     58. 91.100 / 58. 91.100
  libavformat    58. 45.100 / 58. 45.100
  libavdevice    58. 10.100 / 58. 10.100
  libavfilter     7. 85.100 /  7. 85.100
  libswscale      5.  7.100 /  5.  7.100
  libswresample   3.  7.100 /  3.  7.100
  libpostproc    55.  7.100 / 55.  7.100
Input #0, image2, from 'data/123.jpg':
  Duration: 00:00:00.04, start: 0.000000, bitrate: 170762 kb/s
    Stream #0:0: Video: mjpeg (Progressive), yuvj444p(pc, bt470bg/unknown/unknown), 1920x1080, 25 tbr, 25 tbn, 25 tbc
Stream mapping:
  Stream #0:0 -> #0:0 (mjpeg (native) -> mjpeg (native))
Press [q] to stop, [?] for help
[swscaler @ 000001d3c41b6c00] deprecated pixel format used, make sure you did set range correctly
Output #0, image2, to 'data/709ad7cc5a8a11ec82c82c4d54eea02b.jpg':
  Metadata:
    encoder         : Lavf58.45.100
    Stream #0:0: Video: mjpeg, yuvj444p(pc), 1280x720, q=2-31, 200 kb/s, 25 fps, 25 tbn, 25 tbc
    Metadata:
      encoder         : Lavc58.91.100 mjpeg
    Side data:
      cpb: bitrate max/min/avg: 0/0/200000 buffer size: 0 vbv_delay: N/A
frame=    1 fps=0.0 q=7.8 Lsize=N/A time=00:00:00.04 bitrate=N/A speed=0.28x
video:106kB audio:0kB subtitle:0kB other streams:0kB global headers:0kB muxing overhead: unknown
data/709ad7cc5a8a11ec82c82c4d54eea02b.jpg
效果图片:


OK,没什么问题。
总结
没啥好总结的。
分享:
Perhaps one day you muster the courage, to make a clean breast of everything in the heart only ended up to let others see the joke, because they did not understand you to say what, also don't know why do you think things are so important, say, almost cried out. I think the worst thing in the world, than with full of heart and secret, but no one can tell, but no one can understand!
——《肖申克的救赎》
如果本文对你有作用的话,请点个赞吧,谢谢!

神龙|纯净稳定代理IP免费测试>>>>>>>>天启|企业级代理IP免费测试>>>>>>>>IPIPGO|全球住宅代理IP免费测试


